Discover buying guides, renovation inspiration, smart toilet features, and expert bathroom care tips.
Choosing Wall Mount Bathroom Vanities requires more than matching a cabinet to your tiles. The right vanity should support daily routines, protect your storage needs, and make the room feel easier to use. Before choosing a finish, measure the wall, plumbing position, door swing, and walking clearance. A beautiful vanity can still fail if drawers hit the toilet or pipes limit installation.
Interior designer Jamie Gold, a wellness design expert, says, “A bathroom should support how people live, not simply how it looks.” That principle matters here. Wall-mounted designs can create visible floor space beneath the cabinet, making a compact bathroom feel lighter. They also simplify cleaning around the base. However, floating storage is not automatically practical. Shallow drawers may hold little, while a low installation can strain your back. I have seen homeowners focus on sleek photography and overlook towel access, outlet placement, and the height of family members.
This guide explores 10 Tips for Choosing Wall Mount Bathroom Vanities, from measuring wall strength to comparing materials, sinks, hardware, and installation requirements. Look closely at real details: a damp towel beside the basin, a hair dryer inside the drawer, or water splashing near an unsealed edge. These moments reveal more than showroom lighting. Some choices may remain imperfect. That is normal. A vanity should fit your room, habits, and maintenance tolerance, rather than imitate a trend. Careful planning will not remove every compromise, but it can prevent expensive surprises and create a bathroom that feels dependable every morning.
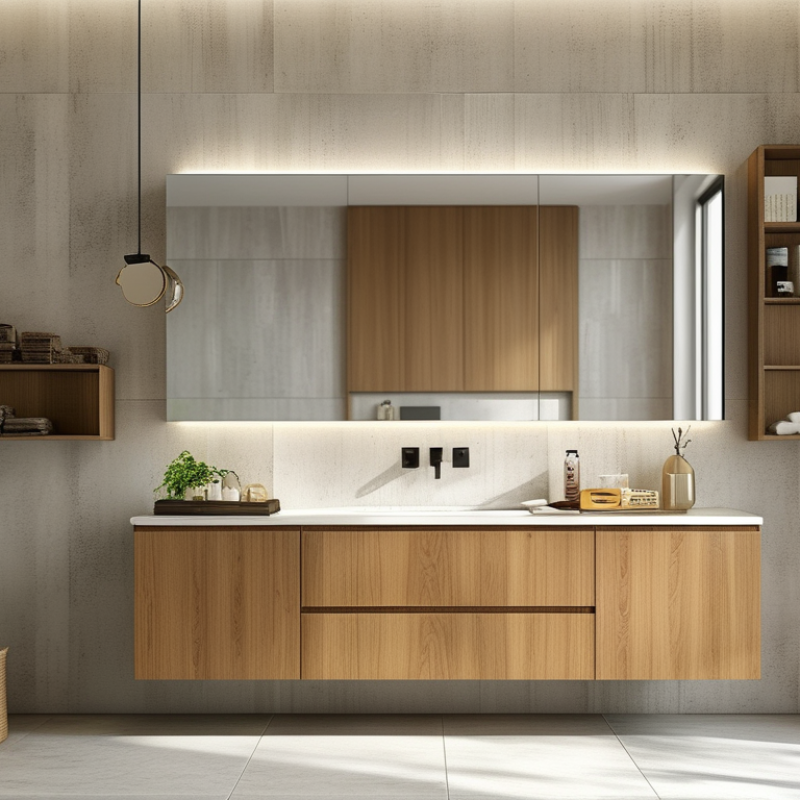
10 Tips for Choosing Wall Mount Bathroom Vanities
Assess Your Bathroom Layout and Available Wall Space
Before choosing a wall-mount vanity, map the finished bathroom carefully. Measure wall width, ceiling height, door swing, toilet projection, and outlet locations. A laser level helps. I have found that skirting boards and uneven floors often steal more space than expected. That detail is easy to miss.
The National Kitchen & Bath Association’s bathroom planning guidance recommends at least 21 inches between a fixture and an opposite wall or obstruction. Aim for more where possible. Houzz’s 2024 U.S. Bathroom Trends Study reported that 33% of renovating homeowners enlarged their shower area. That change can quietly reduce vanity-wall space. A floating cabinet may open the floor visually, but its plumbing still needs room behind the wall. Locate studs, supply lines, drains, and electrical wiring before drilling. Add proper wall blocking for heavier stone tops or deep drawers.
Draw the room to scale on graph paper. Mark a 30-inch-wide vanity, then test door and drawer movement. Leave room for elbows beside the basin. Where accessibility matters, ADA Standards specify a 30-by-48-inch clear floor space at a lavatory approach, although local requirements can differ. I would not trust a product diagram alone. Real walls are rarely perfect. A second measurement can prevent an expensive, awkward installation.
| No. | Assessment Area | What to Measure or Check | Useful Reference | How It Affects Your Choice |
|---|---|---|---|---|
| 1 | Measure the usable wall width | Measure the clear width between side walls, tall cabinets, doors, and other fixed obstacles. | Record the measurement at the floor, countertop, and mounting height because walls may not be perfectly square. | Select a vanity narrower than the smallest clear measurement and allow room for trim, installation, and door movement. |
| 2 | Check the available depth | Measure from the finished wall to the front edge of the available floor area, including nearby fixtures and traffic paths. | Common bathroom vanities are approximately 18–24 inches deep; compact models may be shallower. | Choose a reduced-depth unit for narrow rooms, while confirming that the basin still provides practical washing space. |
| 3 | Plan the walking clearance | Measure the open space in front of the vanity and between the vanity, toilet, shower, and door swing. | A comfortable passage is often about 30–36 inches; local building rules may require specific clearances. | A wall-mounted design can visually open the floor, but its projection must not obstruct circulation or door operation. |
| 4 | Locate plumbing connections | Identify the drain, hot and cold supply lines, shutoff valves, and any pipes inside the wall. | Drain and supply locations vary by room and may not align with the cabinet’s pre-cut openings. | Choose a cabinet that accommodates the existing plumbing or budget for qualified plumbing adjustments before installation. |
| 5 | Find wall studs and solid support | Use a stud finder or verified construction drawings to locate studs behind the finished wall. | A wall-mounted vanity must be secured to structural framing or a properly designed reinforcement system. | If the stud layout does not match the mounting rail, plan blocking or reinforcement before the wall is closed. |
| 6 | Set the countertop height | Consider the vanity box height, countertop thickness, basin type, faucet height, and the users’ comfort. | Many bathroom countertops are installed around 32–36 inches above the finished floor, depending on the design. | Wall mounting allows height adjustment, but the final basin rim should not interfere with mirrors, lighting, or user comfort. |
| 7 | Check door and drawer movement | Map the opening path of vanity drawers, cabinet doors, bathroom doors, and shower enclosures. | Drawers require unobstructed space directly in front of the cabinet, while hinged doors need side clearance. | Select drawer or door configurations that remain usable when another fixture or door is open. |
| 8 | Review outlet and switch locations | Mark electrical outlets, switches, sconces, ventilation controls, and their relationship to the mirror and cabinet. | Electrical work in wet areas must follow local codes and typically requires appropriate protection and placement. | Coordinate the vanity, mirror, lighting, and outlet positions before drilling or relocating electrical components. |
| 9 | Account for baseboards and wall irregularities | Inspect baseboard thickness, tile buildup, corner conditions, uneven surfaces, and the finished floor level. | Wall-mounted cabinets may need a spacer, filler panel, or carefully leveled mounting system. | Planning for irregularities prevents gaps, crooked installation, and interference with the cabinet’s underside or doors. |
| 10 | Confirm storage and cleaning needs | List the items to store and measure tall or bulky products such as bottles, towels, and cleaning supplies. | Open space beneath a wall-mounted vanity improves floor access but does not replace enclosed storage. | Balance drawer capacity, cabinet organization, legroom, and easy floor cleaning when selecting the final layout. |
Measure wall width, ceiling height, door swing, toilet projection, and outlet locations. Draw the room to scale. Check skirting boards and uneven floors. They can quietly reduce usable space. A second measurement is worthwhile.
Aim for at least 21 inches between the vanity and opposite walls or obstructions. Leave extra room for elbows beside the basin. Test every drawer and door on your floor plan. The bathroom may feel tighter than expected.
Yes, its raised cabinet exposes more floor and creates a lighter visual effect. However, plumbing still needs space behind the wall. Mark drains, supply lines, wiring, and wall studs before drilling. Looks can mislead.
Locate the studs before installation. Add suitable wall blocking for heavy stone tops or deep drawers. The bracket must support the cabinet, countertop, basin, and stored items. A loaded drawer adds surprising weight. I would not rely on appearance alone.
Consider marine-grade plywood or moisture-resistant engineered wood. Inspect the core, not only the decorative finish. Sealed edges help prevent swelling. Avoid raw edges beneath the basin. They absorb water quickly.
Check drawer joints, cabinet fasteners, hinges, and bracket strength. Dovetail joints and corrosion-resistant hardware often withstand repeated use better. Measure plumbing clearance before ordering. A beautiful cabinet can still fail during installation.
Nonporous porcelain or solid-surface countertops need less routine sealing. Natural stone may require regular sealing. Wipe puddles near the basin promptly. I sometimes overestimate stone’s resistance.
Keep indoor humidity below 60%, with 30% to 50% preferred. Use an exhaust fan vented outdoors. Intermittent airflow around 50 cubic feet per minute is commonly recommended. Continuous ventilation may use about 20 cubic feet per minute. The cabinet cannot fix poor ventilation.
Leave a small cleaning gap beneath the floating cabinet. Inspect seams, edges, and brackets every few months. Look for swollen panels, soft edges, or loose hardware. Small signs matter. Do not wait for failure.
Choosing Wall Mount Bathroom Vanities starts with understanding your bathroom’s layout, wall structure, and available clearance. Measure the installation area carefully, considering doors, shower zones, mirrors, and walking space. Select a vanity size that provides sufficient counter room without making the bathroom feel crowded, and determine a mounting height that suits the household’s comfort and plumbing requirements. A secure installation is essential, especially when the vanity will support a countertop and sink.
Material quality and moisture resistance should also guide your decision, since bathrooms are exposed to humidity, splashes, and frequent cleaning. Look for sturdy construction, durable finishes, and surfaces that are easy to maintain. Before installation, plan storage needs, drawer access, plumbing connections, and future repairs to ensure everyday convenience. Finally, coordinate the vanity with the sink, faucet, mirror, lighting, hardware, and overall bathroom style. A well-matched design can create a balanced, practical, and visually spacious environment while making the most of limited floor area.